Identity checks
Use this page to confirm a person is who they say they are: the customer, or a person in a company's or trust's structure. Anyone in your firm who works with customers can do it.
Before you start
- The person is on the customer record, with a date of birth and, for the online check, an email address. See Add a person, or Ownership and control for people in a structure.
- Open the customer and choose the Checks tab. For an individual, Identity is the first step. For a company or trust, select the person in People who need checking and their steps open below the table.
Steps
Send the verification link
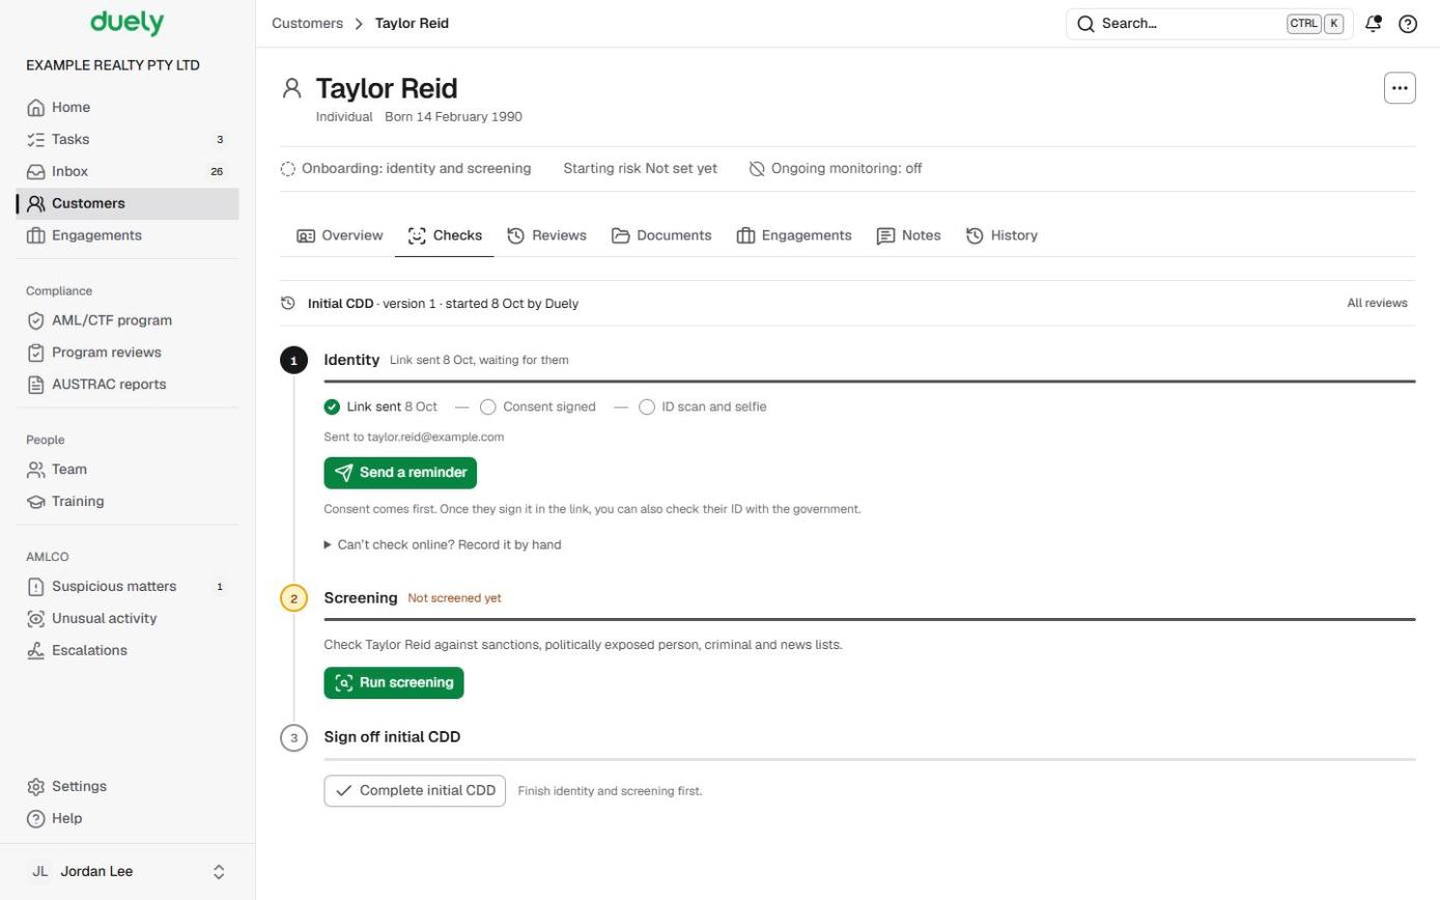
- Under Identity, choose Send the verification link. A new individual is usually sent it when you save them, and people in a structure when you commit it, so the link may already be out.
- The person gets one email. The link opens your firm's consent form first. Once they agree, it continues to the ID scan and a selfie on their phone.
- Follow progress on the line of ticks: Link sent, Consent signed, then ID scan and selfie. Choose View beside the consent to see the form as they saw it, the name they typed and when.
While you wait
- Send a reminder sends the same link again, and the message says which address it went to. The step tells you when you can send another.
- Copy the link copies it so you can send it another way.
- If the email address was wrong, correct it first: on the Overview tab choose Edit for the customer, or open the person's row on the Ownership tab. A reminder resends the link that is already out, so check the address in the message. If it went to the old address, copy the link and send it to the right one yourself.
- The step shows how many days the link has left. If it runs out, choose Send a new link.
Check ID with the government
If your firm uses government ID checks, Check ID with the government appears once the person has signed the consent. Consent comes first: until then the step says so. You can run it while the scan is still outstanding, or after the scan to confirm the document Duely Verify read.
- Choose Check ID with the government. The dialog shows the name, the date of birth from the profile, and the document details. Choose Driver licence (state, licence number and card number) or Passport (number, gender as shown, expiry date).
- If you entered the details yourself, answer How did you confirm this is the person?: in person with the original, or with a certified copy.
- Choose Check with issuing agency. Only the answer comes back: satisfied, not satisfied, or unavailable.
If the agency can't confirm the document, confirm identity another way, choose Check again, or Send to the AMLCO with a note. The AMLCO decides whether work can continue.
Can't check online? Record it by hand
Use this when the person declines online checks, can't use them, or the online check doesn't succeed.
- Open Can't check online? Record it by hand and, under I've seen their ID, choose Record it.
- In the dialog (for example Confirm Alex Morgan's identity by hand), choose how you confirmed it (Sighted the original in person or Certified copy), the Document, Document number, Issued by and Expiry date.
- Choose the Result (Verified, Not verified or Inconclusive), write your Notes, and choose Record.

What Duely checks
- Consent declined. The phone scan and the government check can't be used. The step shows their reason, if they gave one, and offers to record the check by hand or send the request again.
- Date of birth doesn't match. The step reads Check the date of birth and shows both dates. Correct the date of birth if the ID is right, otherwise send a new link.
- A check that doesn't pass. It reads Not verified or Needs review with the reason. Failed attempts stay on the record.
- An expired ID. A check by hand needs the document number and expiry date, and Duely doesn't accept an ID that has already expired. When a recorded ID expires while the customer has an open engagement, they move to Needs review.
- The government check. It needs signed consent, a date of birth on the profile, and a given and family name. It confirms the document is genuine, not who is holding it.
- A blocked customer. No check can be started.
What happens next
When the step reads Verified (or Confirmed by hand), the document and how it was checked are listed under it, and the next step is Screening. See Screening and matches.
The law
Last updated: 8 October 2026
These pages are general information about the Duely product and the AML/CTF obligations it supports. They are not legal advice and do not cover your firm's particular circumstances.